
Using the File Manager
The Xmailer builder includes a built-in file manager. The file manager is the component that you will use to browse, search, and select the images and documents that you wish to use in your email or page.
With the handy file manager you can:
Browse, search, and sort existing files
Import new files
Create folders
Preview and insert images into your design
How to browse or search files
How it Looks: List and Grid View
The file manager will open over the builder, covering the entire working area. This allows you to browse your files without worrying about your screen size or resolution.
You will find a top section with actions and navigation helpers. Most of the space is used to list your files and the information you need to work with them: it's organized into:
Grid view

List view

How you Access It
The file manager will load in several scenarios. First of all, you need to edit or create an email, page, or template.
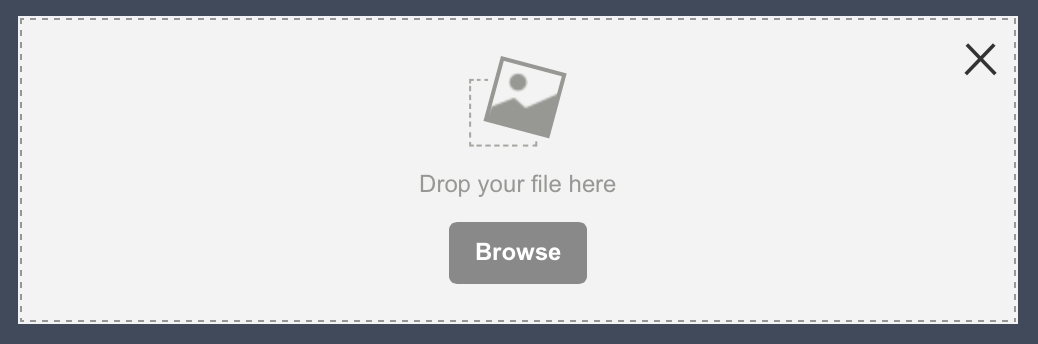
a. When you click on the Browse button in an image placeholder, which is displayed when you drag and drop an image content block into a design.
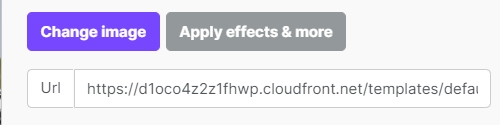
b. When you click the Change image button in the image properties panel:
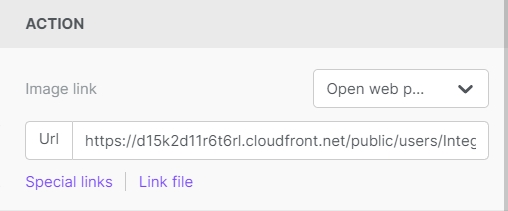
c. When you click on Link file when working with images and buttons:
How to Upload Files
The quickest way to upload a file into the file manager is to drag it from your computer to the file manager window, dropping it into the upload area. And it supports multi-file upload too. Cool, huh?
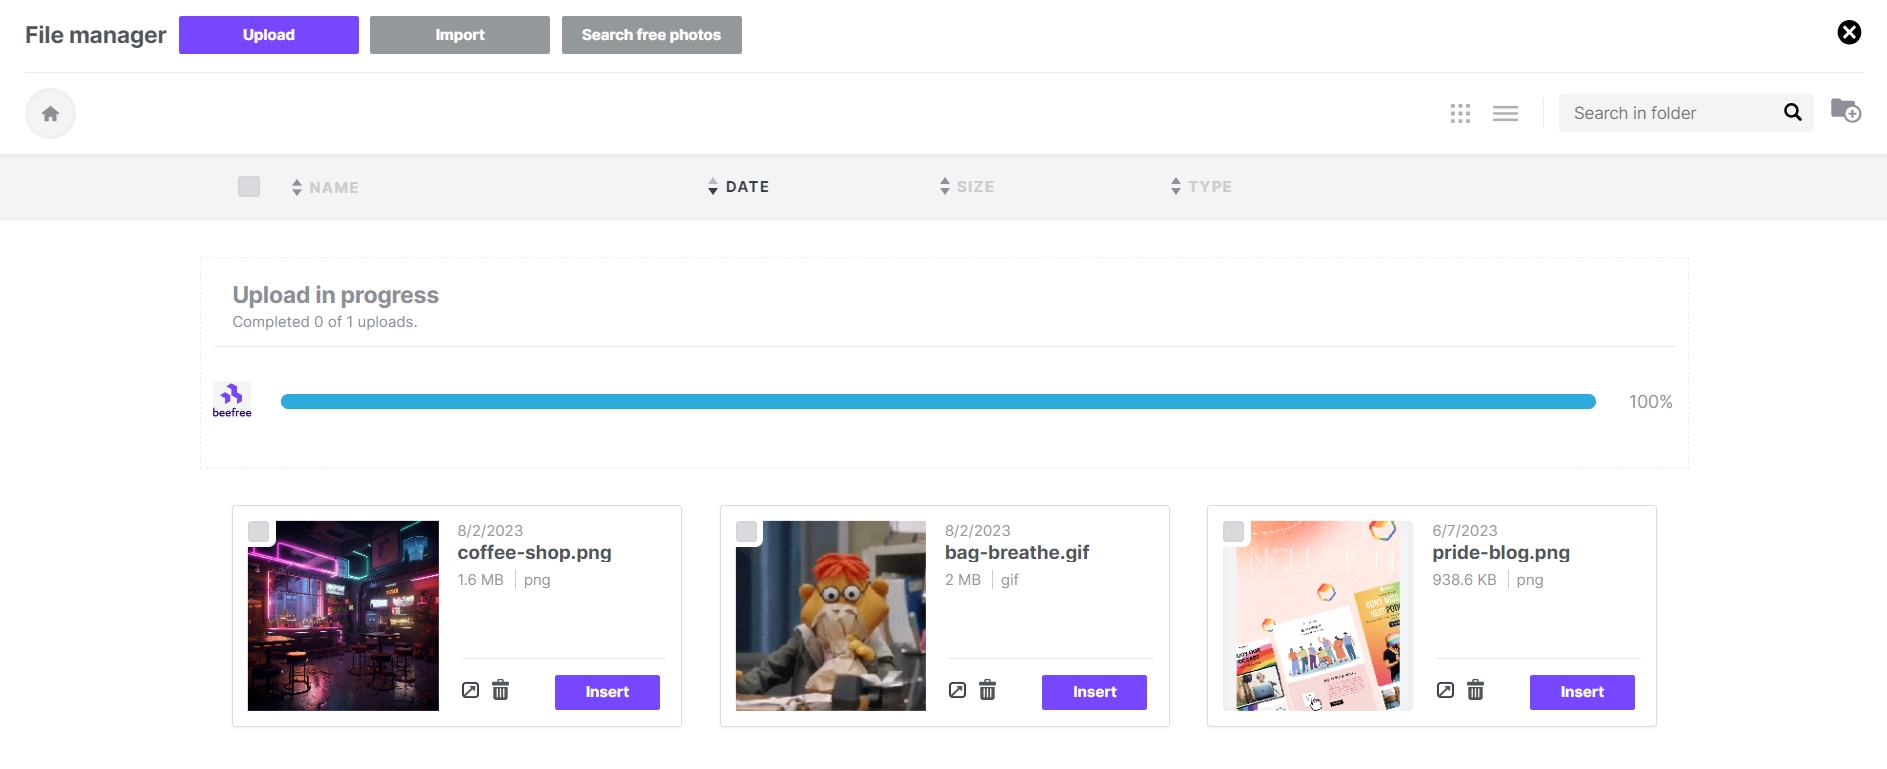
There are other ways to do so. When you use the Xmailer builder full screen, and can't drag from your desktop, the Upload or Import button will do the trick.
How to import files from other applications
The Import feature allows you to import content via URL or services like Google Drive, OneDrive, and Box. You can also import from Facebook and Google Photos.
How to Browse or Search Files
To locate your desired image or document, browse your folders and order their content by name, date, size or type by clicking on the sort labels on top of the list.
An arrow icon next to these labels means that this is the current filter, and its orientation will tell you the order, ascending or descending.
Too many files in the selected folder? Click on the lens icon to run a search. The results will be filtered on the fly. Mind that this search is performed only in the current folder, and not in your entire repository.
How to Use Files
When you move your cursor over a file or folder, that row will be highlighted and the available action icons will be shown on the right side:
insert and preview for files
delete for both files and folders
If an action is momentarily not available, you will be notified by the tooltip text of the icon. For example, when you try to delete a folder that contains files because only empty folders can be deleted.

If you want to delete many files or folders, use the checkboxes to select them, the delete button will be shown at the top, on the right side. Only elements that can be deleted will have a selectable check-box.

How to Move Files
You can move files within the File manager using the move button. You can access the move icon on the file within the File manager. The move button is a folder with an arrow pointing right inside it. Use this button to move files.
To move a file, take the following steps:
Enter your File manager
Navigate to the file you would like to move
Click the move button
A popup will appear displaying a list of destinations for your file
Select the file’s new destination from the list
Click Move to confirm the action
The following GIF shows an example of how to move files to new destinations within the File manager. It also shows an example of how the file URL remains the same as it travels between destinations.

Considerations
Consider the following regarding the new File manager functionality:
When you upload new files to the File manager, the URL will have a new format compared to previously uploaded files
Your existing file URLs will remain the same as before
A single file has a maximum of 50 duplicate uploads
When you move files within the File manager, the URL does not change
In the event there is a name conflict, the File manager will add a suffix of _1, _2, _3, etc. to differentiate between the files
How to Organize Folders
You can create the folder structure you prefer to organize your files. To add new folders, use the Add folder icon.
For your folder names, you can use letters (upper and lower case), numbers, spaces, periods (.), hyphens (-), or underscores (_).
To navigate to the parent folder, use the top breadcrumb. Clicking the home icon will take you to your root folder.

Current limitations
The following file extensions cannot be uploaded to the file manager: .js, .cjs, .mjs, .php, .phtml, .php3, .php4, .php5, .php7, .phps, .php-s, .pht, .phar, .HTML, .zip, .rar, and archive file formats.
The maximum allowed file size you can upload is 20MB.
You can't move files from one folder to another one. This is because the upload location determines the URL path for your file. Moving the file would change the URL and break the link anywhere it's currently in use.
If you are uploading an image that is wider than 1920 pixels, the integrity of the image may be altered upon upload or import. The image will be resized to be no wider than 1920px. In other cases, the colors may change, and gifs may lose frames. Consider making sure that any images that you upload are no wider than 1920px.
Last updated