Xmailer
  • Xmailer: The Ultimate Email Marketing Platform
  • CONTACT LIST MANAGEMENT
    • Create a contact list
    • Resubscribe after an unsubscribe
    • List X-Ray
    • View or search your contacts
    • Contact Tags Manager
    • Export your contact list
    • Uploading a suppression list
    • Large suppression files
    • Exclusion Lists
    • GDPR Delete & Export
  • SEGMENTING
    • What you can do with segments
    • Create a segment
    • Designing your segment
    • Tag contacts in a segment
    • Export a Segment's Contacts
    • A/B test using segments
  • BROADCAST
    • What you can do with broadcasts
    • Create a Broadcast
    • Broadcast Settings
    • Choosing your email composer
    • Augment your subject line with a preheader
    • Adding your recipients
    • Schedule your Broadcast
    • Resend to non-openers automation
    • Broadcast Reporting
    • Duplicate a broadcast
    • Tag contacts who Open your broadcast
    • Resume an incomplete broadcast
    • Export Broadcast Openers & Unsubscribes
    • Cancel a broadcast
    • Cancel a broadcast funnel trigger
    • Revise tagging and funnel triggers for sent broadcasts
  • USING THE DRAG & DROP EMAIL COMPOSER
    • The Basics
      • Content Row Properties
      • Designing your email - Using Columns
      • Footer
      • Social Media Component
    • Working with multimedia
      • Adding video to your page
      • Using the image editor
      • Using dynamic images for countdown timers and personalized content
      • Search for free, high-quality stock photos in Xmailer
      • Editing Image Properties
      • Adding GIF animations & animated stickers with GIPHY
      • Adding video to your email
      • Using the File Manager
      • How to use external images in your design
    • Working with content blocks
      • Table Content Block
      • Using Internal Links in Pages
      • Working with paragraph and list content blocks
      • Using dividers and spacers
      • Letter and Paragraph spacing
      • Working with titles
      • Working with menus in Xmailer
      • Working with icons
      • Working with custom HTML
    • Settings, rows, & columns
      • Dark Mode Preview
      • Designing with Workspace Styles
      • Designing with Saved Rows
      • Mobile design mode
      • Co-editing
      • Column management
      • Configuring design settings
      • Settings, Rows, and Content: How do they work?
      • Adding a background image to your designs
      • How do I change the properties of a row?
      • Mobile Optimization Options
      • How do I select a row vs. content?
      • Undo, redo & history
      • Working with padding
      • Working with borders
      • Saving your designs in Xmailer
      • Locking content to prevent editing
  • FUNNELS
    • What you can do with funnels
    • Create a funnel
    • Choosing your funnel type
    • From Name & From Email - editing
    • Activating your funnel
    • Trigger an email funnel from a broadcast
    • Tag contacts who open your funnel messages
    • Choosing your email composer
    • Page Augment your subject line with a preheader
    • Design your automated email sequence
    • Contact Suppression and Exclusion
    • Adding a funnel to an opt-in subscriber form
  • SUBSCRIBER OPT-IN FORMS
    • What you can do with forms
    • Create an opt-in form
    • Sending to double opt-in contacts
    • Choosing your form type: floating bars, lightboxes,inline naked embedded, slide outs
    • Exit intent and display rules
    • Adding email and name input boxes to your form
    • Setting the size of your form
    • Configuring how your form displays on mobile devices
    • Configuring your mobile width
    • Add a close window X to your form
    • Adding a "No" button that closes your form
    • Tag subscribers who opt-in to your form
    • Adding "no thanks" text which closes your form
    • View your form conversion rate
    • Connect an existing form to your account
    • Adding your form to your website
    • Add opt-in subscribers to an automated email sequence
Powered by GitBook
On this page
  • Paragraph block
  • List block
  • Note on existing text content blocks
  1. USING THE DRAG & DROP EMAIL COMPOSER
  2. Working with content blocks

Working with paragraph and list content blocks

PreviousUsing Internal Links in PagesNextUsing dividers and spacers

Last updated 1 year ago

Overview

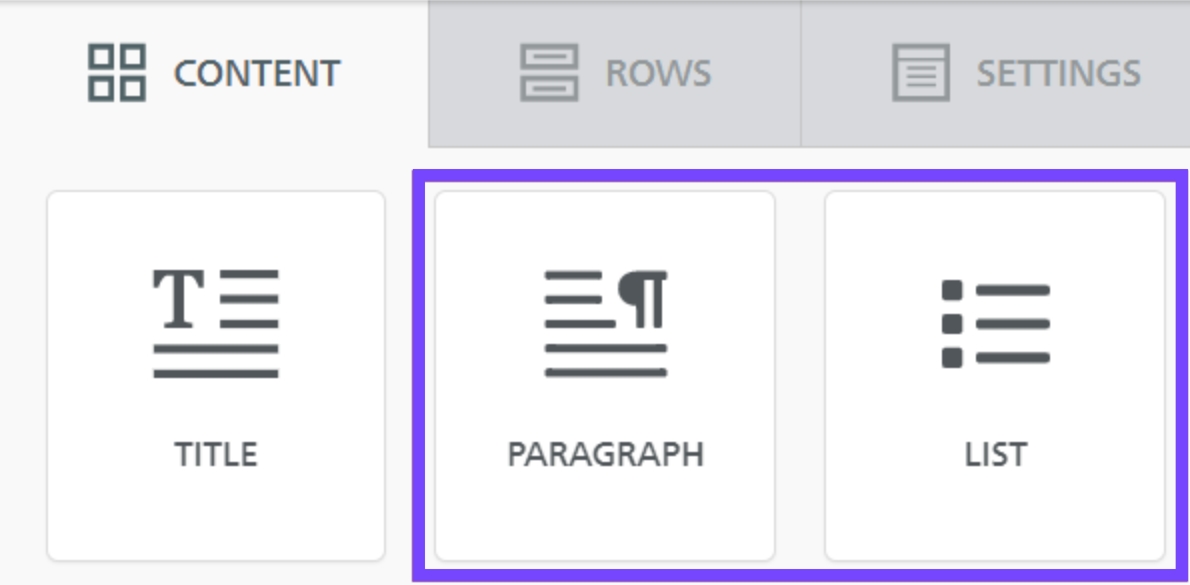
In March 2022, we retired the original Text content block and replaced it with two new content blocks:

  • Paragraph

  • List

We made these changes for the following reasons:

  • To create a better user experience by providing enhanced text formatting options

  • To improve the rendering of text content pasted from an external tool or word processor.

As mentioned above, these new content blocks include enhanced text formatting options. First and foremost, we moved many formatting options to the sidebar. Through this, we've also improved and streamlined our text toolbar. For example, we've included a button for non-breaking spaces.

A font-weight parameter is also available for these text-based blocks. This option allows you to use different versions of your font. Regular and bolded styles are available for all default fonts in Xmailer. Web fonts may have more styles available. You can also use multiple font weights with your own custom fonts. For more information on this, please refer to our article on Using custom fonts in Xmailer.

You may notice these improvements in other text-based content blocks, such as:

  • Button

  • Title

Paragraph block

The new paragraph block functions much like the original text content block. However, you'll notice new options when using it.

The new features available are:

  • Font weight, which allows you to select between the regular or bolded variations of your font. This option is available for all fonts pre-loaded in Xmailer. If you're using custom fonts, you'll need to use a stylesheet that includes a bolded version of your font. For more details, see Using custom fonts in Xmailer.

  • Paragraph spacing, which provides granular control over the carriage return/line break spacing. This option allows you to increase/reduce the space between your paragraphs.

Some settings moved from the text toolbar to the content properties sidebar, including:

  • Font family

  • Font size

  • Alignment

  • Text direction

As a result, the text toolbar is a bit smaller too.

List block

The list content block includes all the new features seen in the paragraph content block. However, you'll find some content properties specific to list content.

The options specific to the list content block are as follows:

  • List type, which allows you to choose an ordered or unordered list.

  • List style type, which enables you to select some basic styling options for your list.

  • Start list from, which is a conditional option that populates when you choose an ordered list. Use this if you're creating an ordered list across multiple content blocks.

  • List items spacing, which allows granular control over the spacing between list items.

  • List items indent, which allows granular control over the indent on list subitems.

Note on existing text content blocks

Many Xmailer templates still include the original text content block. If you've used Xmailer for some time, you likely have custom templates that use the text content block as well. In other cases, you may have saved rows that include this type of content.

Existing text content blocks will populate with the original formatting options. As a result, any of your templates or saved rows that include it will not update automatically. You'll see the original behavior in the toolbar and sidebar with the old content block.

You can continue to use the text block in any design where it already exists. Alternatively, you can use saved rows to continue designing with it. However, the text content block will no longer be available from the Content tab. To create text content from scratch, please use the new Paragraph and List blocks.

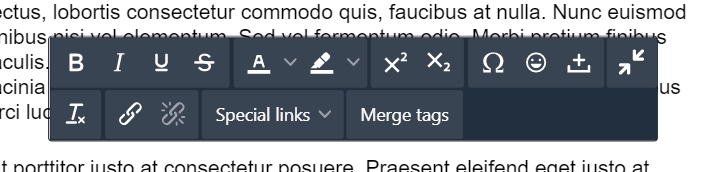
The only addition to the text toolbar is the icon to the right of the emoticons option. You can use this button to insert with the click of a button.

non-breaking spaces